
A step by step guide on repairing and replacing the fresh or recycled flow switch.
Scan to View on mobile device

There is a Printer Friendly PDF below for download.
The flow switch is part of the assemblies mounted on the back of the bridge, adjacent the main enclosure, and directly above the pressurized grease reservoir
Tools and supplies:
● Adjustable wrench
● Pipe sealant or Teflon tape
● 220 grit sandpaper
● Scouring pad

Turn off the air, water, and power at the source and machine.
Unscrew the silver metal nut to disconnect the flow sensor cord.
Unscrew the sensor from the tee with an adjustable wrench.
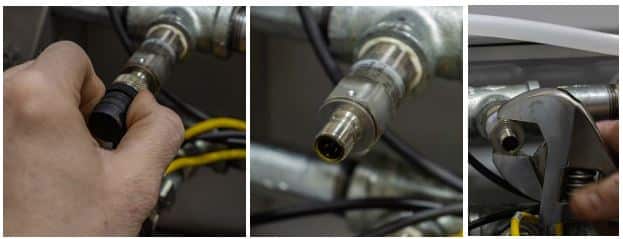
Important: Stand to the side of the sensor when removing it to avoid getting splashed with water.
If servicing the sensor, use sandpaper, then a scouring pad to remove corrosion from the sensor stem. If you are replacing the sensor discard the old one.

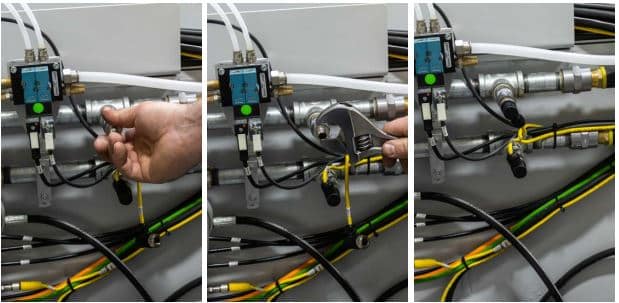
Apply sealant to the sensor’s threads; screw it into the tee.
Tighten the sensor with an adjustable wrench.
Screw in the flow sensor cord.
Turn on the air, water, and power at the source and machine.
Check for leaks and test the new flow sensor.